10 Шагов по снятию плинтусов с фотоинструкцией на wikiHow
Baseboard removable is a simple DIY project. You might find yourself attempting this if you’re planning on remodeling your floors or installing new baseboards. Whatever the reason, with a little patience, you can remove your baseboards as easily as an expert carpenter.
-
Kneel in front of the edge of a baseboard with your tools at the ready. You’re starting at the edge instead of the center to give the pressure caused by prying an exit. If you start in the center, the pressure will be solely on the board, and you’ll run the risk of snapping the board and damaging the drywall. You’ll also prolong the removal process.
- A good place to start is where the door casting meets the baseboard.[1]
-
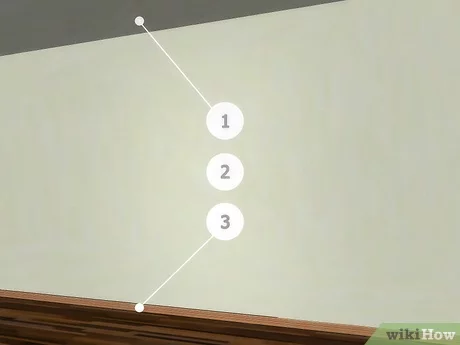
Cut through the caulk binding the board to the wall. Take your utility knife and position it at the top of the edge of the baseboard. This is where the caulk is located. Slowly but firmly press the blade into the caulk and run it along the end of the baseboard. You want to break this adhesive so that, when you’re prying, it doesn’t pull your drywall away with the board.
- Return to your starting position once you have finished.
Advertisement
-
Wedge your taping knife between the board and the wall to create space. Position your taping knife at the top edge of the newly made score. Grab your hammer and tap the knife in deeper to give yourself more of a hold. Flex the knife in the grove a bit to create some spacing.[2]
- If you have shoe molding, go ahead and remove it first with your taping knife using this same process.
-
Find the nails in the space and place your taping knife above them. Take the taping knife out of the grove for a moment and check for any nails. If you don’t find any, move along the board a little and repeat step 3. You’re finding the nail so you have a place to position your crowbar and make pulling off the baseboard easier.
- If your baseboards are glued on, you can skip this step and move onto the next.
- If you have a trim puller, you can use that instead of the taping knife.
-
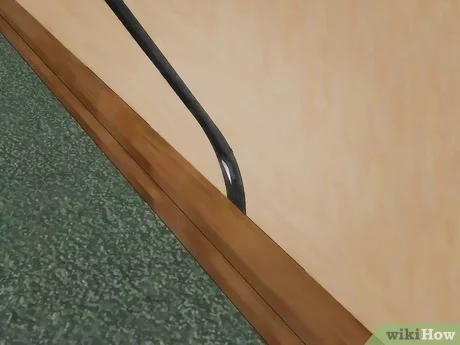
Pull back the space between the taping knife and board with a crowbar. Place the claw of your crowbar between the blade of the knife and the board. Gently pull your end of the bar up to separate the board from the wall. Carefully apply more pressure if needed, but don’t yank or force anything.[3]
- If you feel you’re going to crack the trim or damage the drywall, you may need to settle a second taping knife in front of the first to further disperse the pressure.
- If you have a trim tool, you need neither the crowbar or taping knife for this step. The trim tool will do the job of both by itself.[4]
-
Work along down the baseboard while repeating steps 3 through 5. You’ll steadily free the baseboard from the wall while doing this. Stop once you make it to the end of the current board and the start of the next.
-
Pull the board free with your hand if needed. If the entire board doesn’t come off after step 6, grab the board by the edge where you started and pull gently. If your board still doesn’t come free, it’s probably behind the board immediately next to it. Remove this board if this is the case. Both boards should come free when you reach this step again.[5]
Advertisement
-
Pull the nails out of the back of the board with a pair of nippers. Clamp your nippers at the base of the nail and pull or rock them out. For safety purposes, make sure that you place every nail in a secure place away from you, and then set your boards aside.[6]
- Do not bang the nails out through the front of the board. This will put more holes in the trim than necessary and leave you with a mess of wood pieces to clean.
-
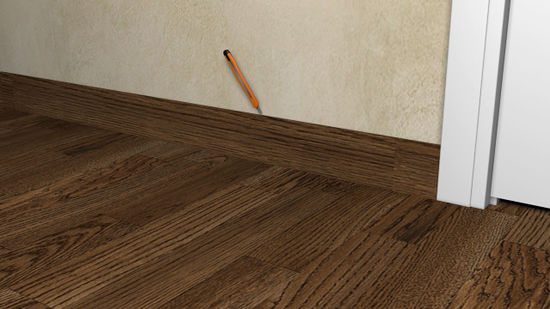
Mark your boards if you plan on using them again. Now that your board is removed, you’ll want to take a sharpie or some other type of marker and jot down a number on both the board and the portion of the wall that used to be immediately behind it.
- The number on the board should correspond with the number on the wall. This way, you’ll know what goes where you’re ready to reinstall.
-
Scrape any remaining caulk off the wall. Take your taping knife and gently chip away at the caulk. Come at it from the side rather than from the top or bottom to avoid accidentally chipping the drywall.
- You can leave a dustpan underneath you while you work to catch the falling chippings.
Advertisement
Ask a Question
200 characters left
Include your email address to get a message when this question is answered.
Advertisement
-
You may be kneeling on the floor for some time, so you might benefit from having some comfortable kneepads or a pillow.
Thanks for submitting a tip for review!
Advertisement
Things You’ll Need
- Crowbar
- Taping Knife
- Utility Knife
- Nippers
- Trim Remover Tool
References
About This Article
To remove a baseboard from a wall, start by cutting through the caulk at the top of the board with a utility knife. By breaking this adhesive, you’
Вы сможете аккуратно отделить плинтус от стены, не повредив гипсокартон. У места разреза вставьте нож между плинтусом и стеной, а затем легко постукивайте молотком сверху, чтобы создать небольшой зазор. Затем обнаружьте гвозди в плинтусе и вставьте кувалду над гвоздем. Если ваш плинтус приклеен, вы можете вставить кувалду в любое место между стеной и плинтусом.


For more tips, including how to clean up your wall once the baseboard is gone, scroll down.
Did this summary help you?
Thanks to all authors for creating a page that has been read 40,071 times.
Did this article help you?

Как делать плинтус скрытого монтажа?
Плинтус скрытого монтажа устанавливается без видимых креплений и дополнительных элементов, благодаря чему создается эстетически привлекательный вид помещения. Вот как можно сделать плинтус скрытого монтажа:
Шаг 1: Подготовка материала и инструментов. Необходимо приобрести плинтус со специальным пазом для скрытого крепления, а также рейки для крепления плинтуса. Для установки потребуются инструменты: дрель, отвертка, угольник, пила для резки плинтуса и ленточный мерный инструмент.
Шаг 2: Измерение и раскрой плинтуса. Проведите измерения стен, на которые нужно установить плинтус, чтобы определить необходимую длину каждого элемента. Режьте плинтус на нужный размер.
Шаг 3: Подготовка стен. Очистите стены от грязи и пыли. При необходимости уберите старый плинтус.
Шаг 4: Установка реек. Установите рейки на стену вдоль линии, на которую будет устанавливаться плинтус. Расстояние между рейками должно быть таким, чтобы паз плинтуса мог легко вставляться в рейку.
Шаг 5: Установка плинтуса. Установите плинтус в паз рейки и осторожно нажмите его на место. Проверьте уровень установки и при необходимости отрегулируйте положение.
Шаг 6: Закрепление плинтуса. Закрепите плинтус на рейках, используя крепежные элементы. Продолжайте устанавливать плинтус, пока не будет уложен весь периметр комнаты.
Шаг 7: Завершающие работы. Закончив установку, закройте щели между плинтусом и стеной монтажной пеной, а затем зашпаклуйте и окрасьте плинтус, если это необходимо.
Важно следить за точностью установки и измерениями, чтобы получить ровный и эстетически привлекательный результат.